
Scott International Procedures
Flight departments may have one or more members designated as flight department administrators. As a flight department administrator, you can access the Scott IPC app portal at https://portal.scottipc.com/ to manage the app status of department pilots, handle crew documents, create and assign personalized checklists to pilots, and manage the department's list of aircraft, allowing pilots to select from assigned tail numbers for Journey Logbook use.
Within the Pilots tab, an FD administrator can view a list of department app users and their permission expiration dates. You can limit document uploading to the portal by toggling the Uploads Restricted button next to a user's name, and disable future logins from a given pilot's account by switching the Status toggle to the off position.
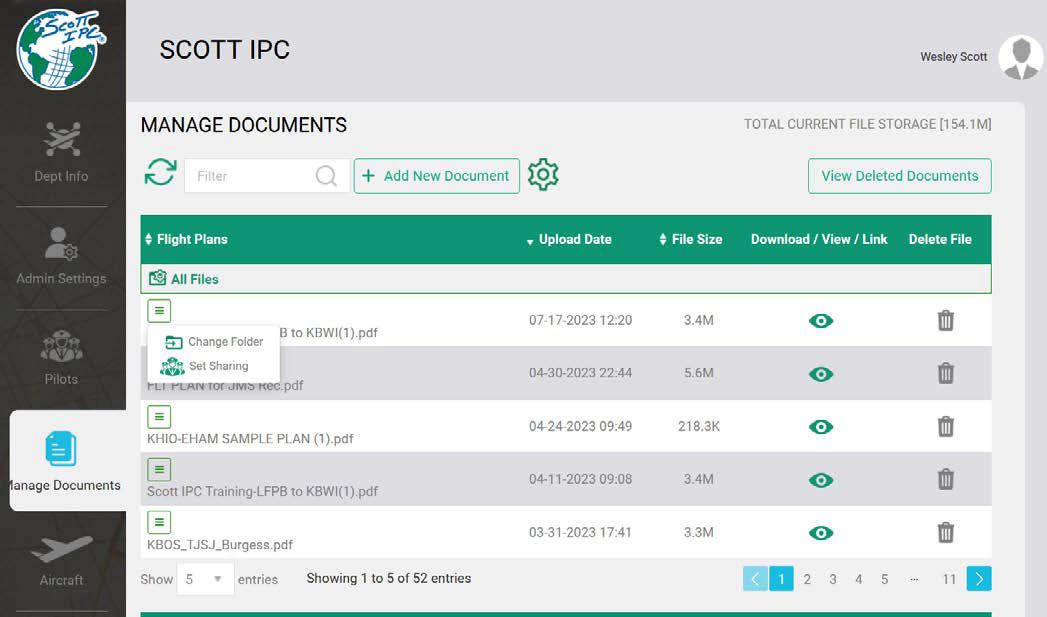
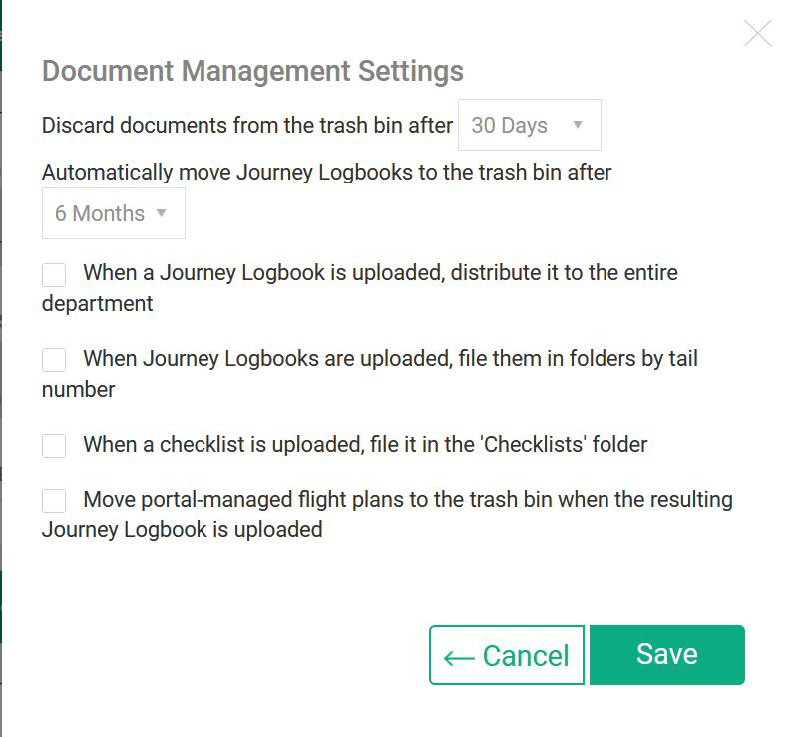
A flight department administrator can upload flight plans, checklists, or other documents and assign them to department members. An admin also has access to Document Management Settings for the department.
To upload documents, navigate to the Manage Documents tab and click the Add New Document button at the top. Select the type of document and either drag and drop the file or browse your device to import it. You may add a description if desired, then click Save. The next screen provides options to share the document with active pilots in the department — share with all members or select specific individuals by searching for their name(s). You can also view who currently has access to the document. Once you have made the desired changes, close the Set Sharing popup.
Note: If you want to re-access the Set Sharing window, click on the menu icon next to the document for which you want to manage permissions and select Set Sharing.
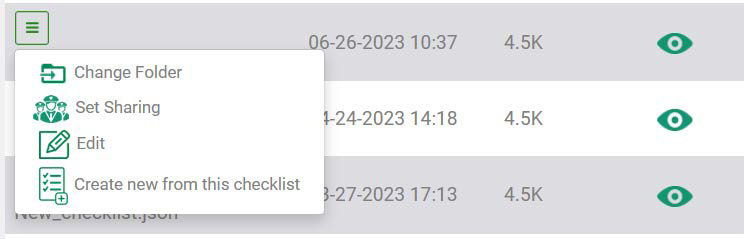
A flight department administrator can create, modify, lock, delete, and assign checklists to department members. Create a new checklist from the Manage Documents tab using either of these two methods:
To make changes to an existing checklist, click on the menu icon next to the checklist name and choose Edit to open a window with the checklist available for editing. Once you've finished making your edits, click Save at the top.
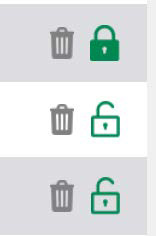
Locking a department checklist prevents it from inadvertently being edited or deleted. To lock a checklist, click on the unlocked icon; it changes to a locked icon, indicating that your checklist has been successfully locked.
Select the trash icon beside the appropriate checklist to delete a department checklist.
Note: A locked checklist cannot be deleted but must be unlocked first.
To distribute your checklist to flight department members, click on the menu icon beside the checklist(s) you want to share and select Set Sharing. The manage sharing window appears, where you can share the document with all members or only specific individuals by searching for their name(s). You can also check who presently has access to the document.
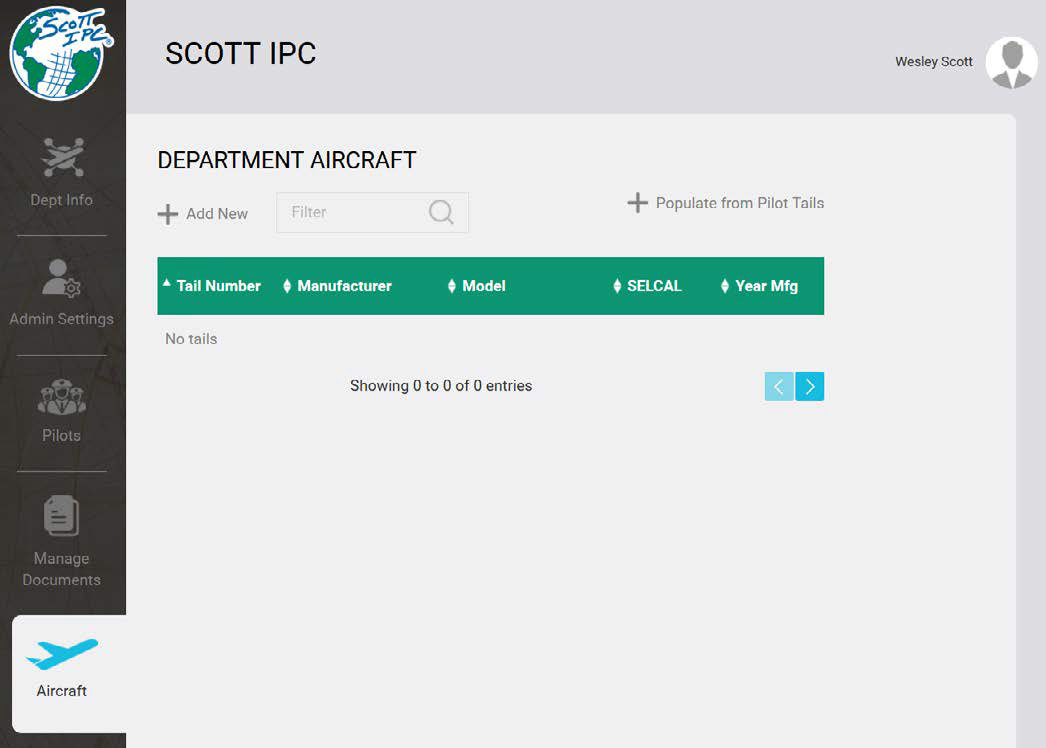
A flight department admin can log into the Scott IPC app portal and create a department's list of aircraft to be used when starting a Journey Logbook for a flight.
Select the + Add New button to add a new department aircraft. The Aircraft details and Manage Assignments screen will appear.
To start, input the aircraft's tail number and then use the search box to find the Manufacturer and Model. The app portal and plotting chart use the ICAO Aircraft Type Designator database for aircraft designations. After finding your aircraft make/model in the search box, select it in the list to populate the Manufacturer, Model, and ICAO Type Designator fields below. All remaining fields are optional information.
While not mandatory, it is advisable to input the SELCAL field of the aircraft. This enables the SELCAL number to be automatically recorded in Journey Logbooks and position reports during a flight. Lastly, the aircraft should be assigned to flight department members; select Confirm at the bottom of the page to complete the aircraft entry.
There are two methods for assigning aircraft to flight department members. You can either check the box that says All department pilots are assigned to this tail to assign it to everyone, or search for specific individuals by name and select them from the search box list.
To modify aircraft information or review the department members assigned to a specific tail number, choose the corresponding tail number from the list on the Aircraft tab of the web portal. Make the desired change, then select Confirm at the bottom to save.