
Scott International Procedures
April 1, 2026
4.3+
There are two ways to bring up the drag and drop tool in Scott Plot®:
Note: The press and hold method defaults to the whole degree Snap To option.

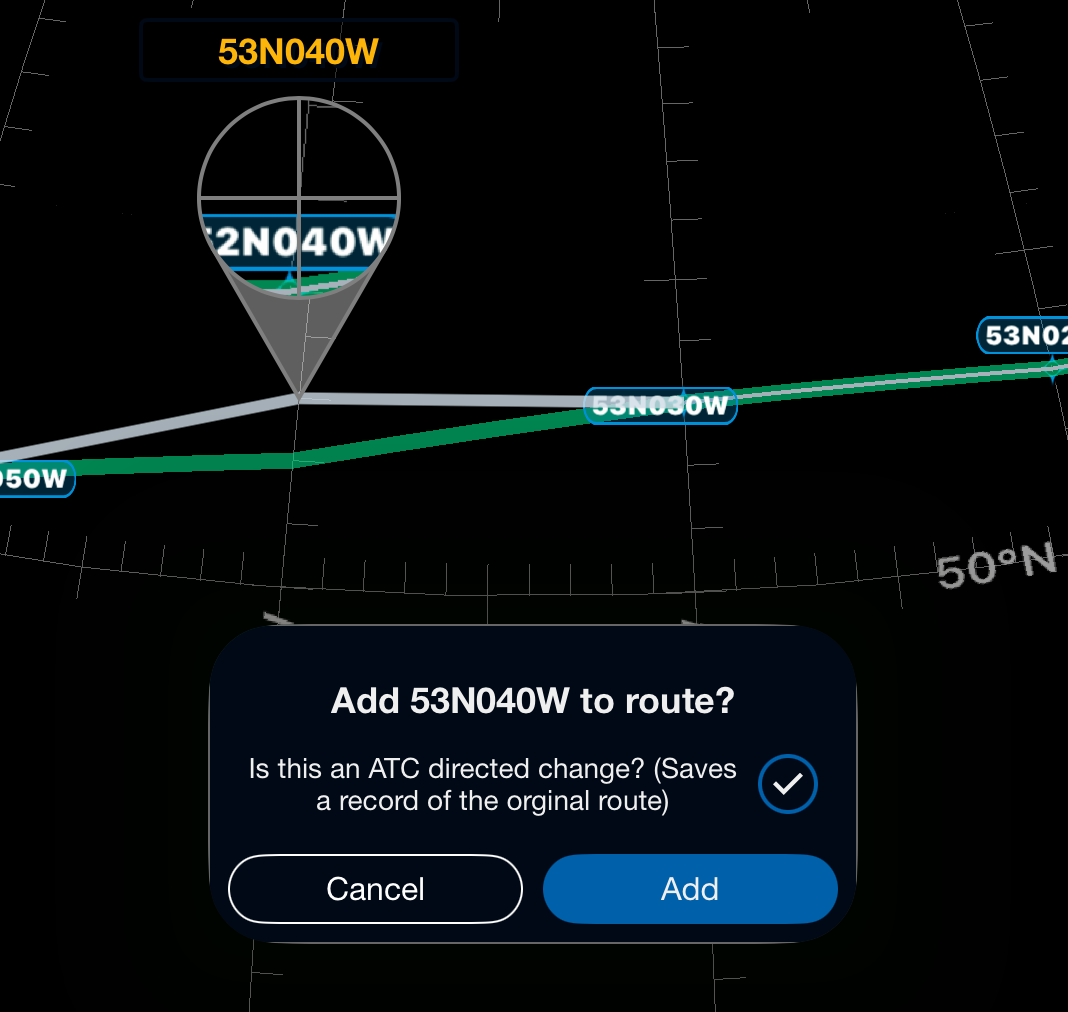
Once the desired Snap To selection has been made, press and hold on the desired portion of the route to make a move; when the magnifying glass appears, move your finger to the desired location and remove finger to set.
The magnifying glass will show the exact point under your finger to ensure accuracy; the Lat/Long of the position seen in the magnifying glass center is displayed above the tool.
After removing finger to set, a confirmation box will appear. If the route change was ATC directed, select the checkbox and tap Add to make the change; this would gray out the original route rather than removing it, ensuring it is captured on the master document.
If not an ATC change, leave the checkbox blank before selecting Add, and the route line will be moved without capturing the original route.

Scott International Procedures, LLC.
Colorado, USA


© 2026 Scott International Procedures, LLC. All rights reserved.
Because safety is in the details™