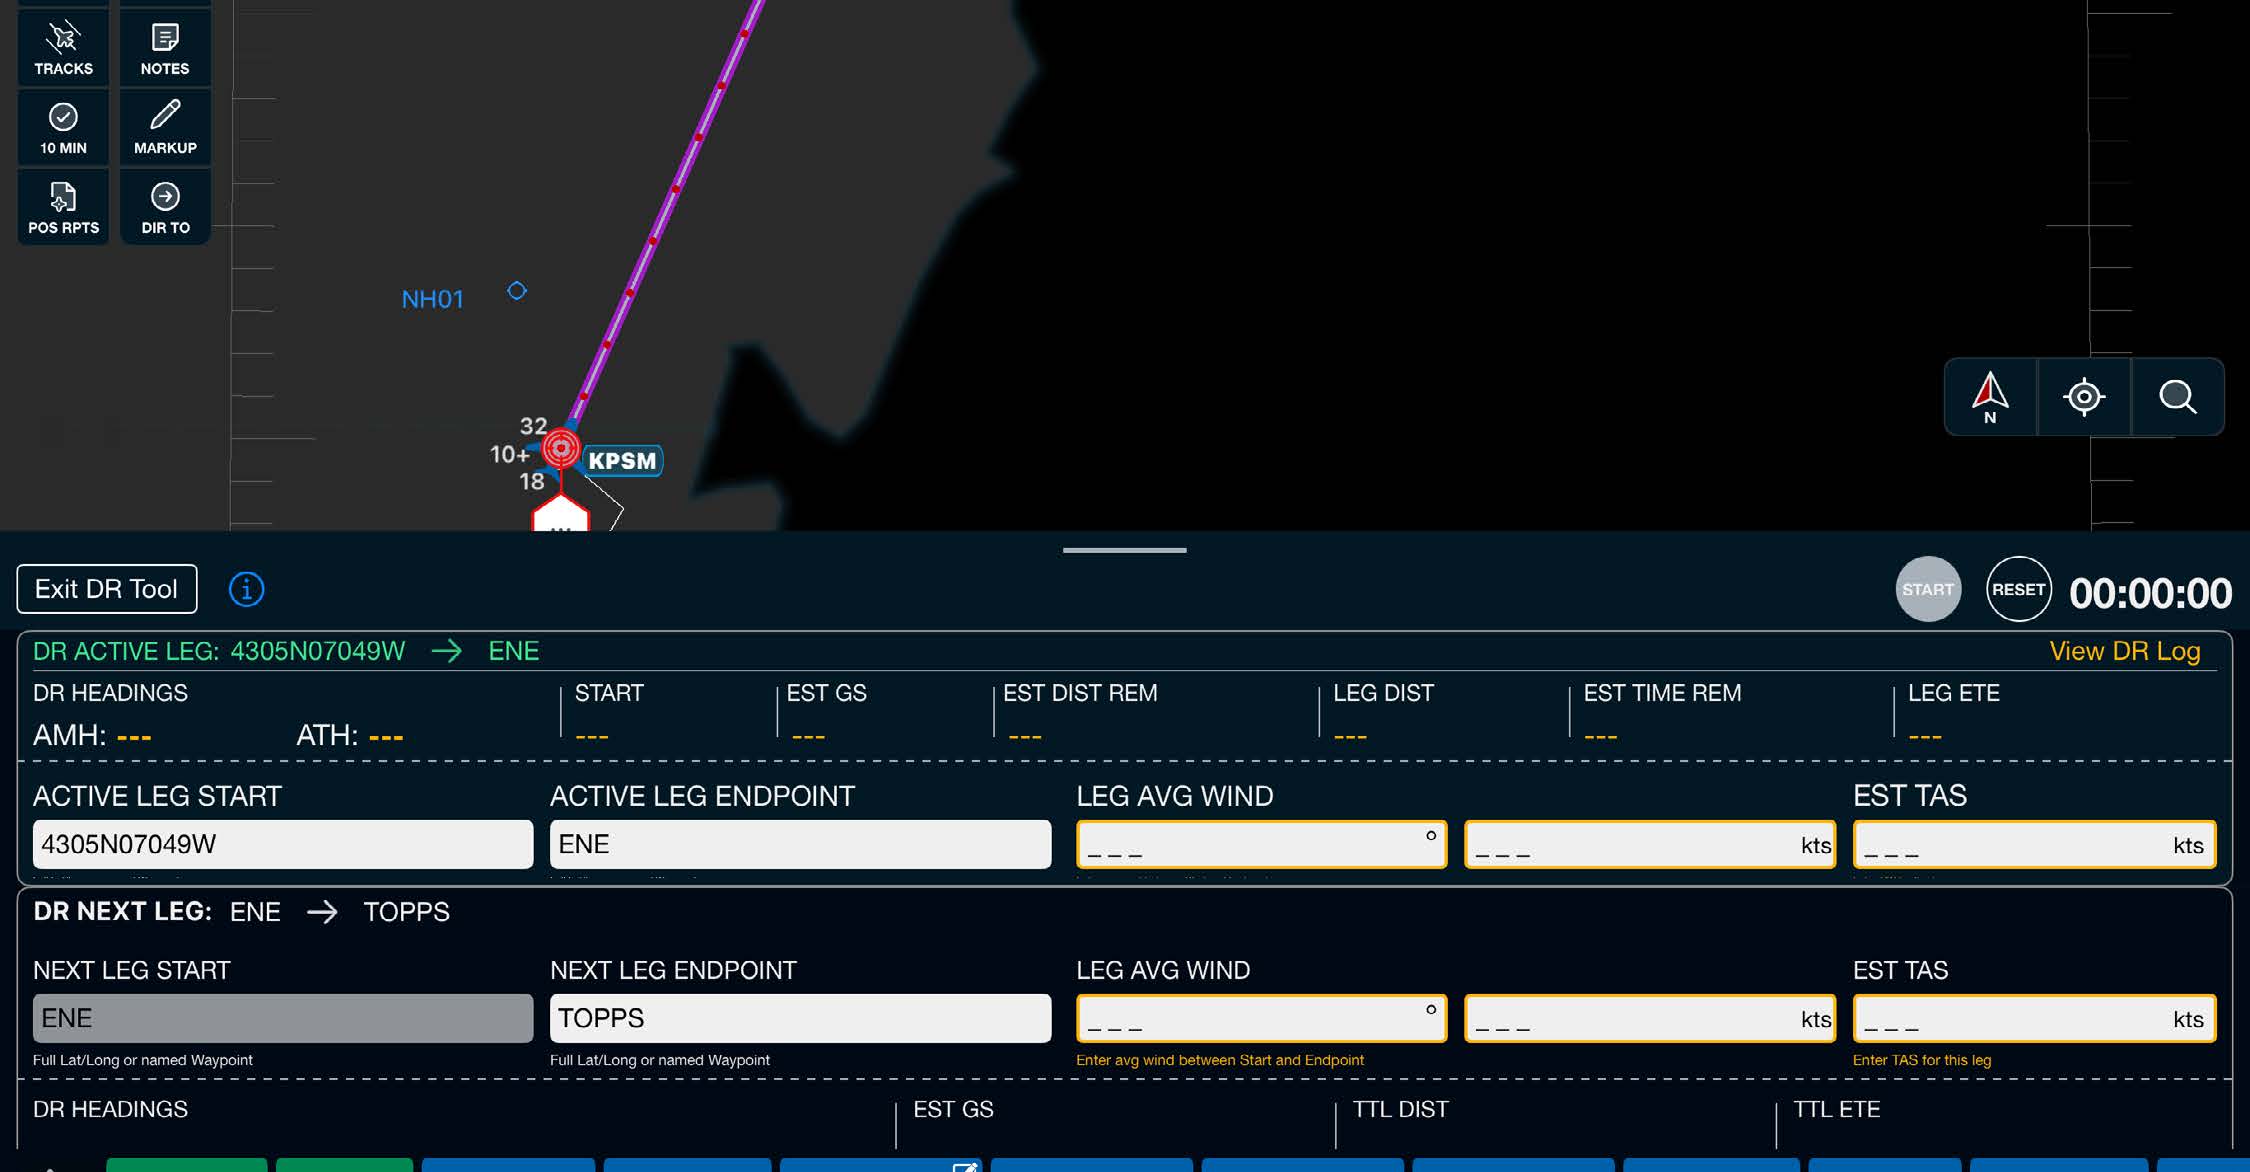
The Dead Reckoning (DR) tool adds to a pilot's contingency and training toolbag. The tool can effectively dead reckon with precise timing and position estimations without interfering with routine app operations. Afterward, the crew can optionally include the Dead Reckoning log in the flight's Journey Logbook.
Note: Using the DR tool will not interfere with other app functions or turn off GPS connections. Currently, the Sync functionality does not support the DR tool. Dead Reckoning guidance can be run on one or two devices, but guidance will be independent.
The DR tool is designed to be utilized in flight both in a contingency situation and outside a contingency scenario to build Dead Reckoning familiarization. The tool is versatile and can effectively serve dual purposes:
Contingency situations: The DR tool is a reliable aid during unexpected navigational disruptions, providing an additional layer of navigational assurance.
Routine operations: Outside of emergencies, the DR tool is an excellent resource for building and enhancing your proficiency with Dead Reckoning techniques, ensuring you're well-prepared for potential navigational challenges.
How to Use the DR Tool
Accessing the DR Tool
The DR tool can be opened from the Red Toolbox menu in Scott Plot®.
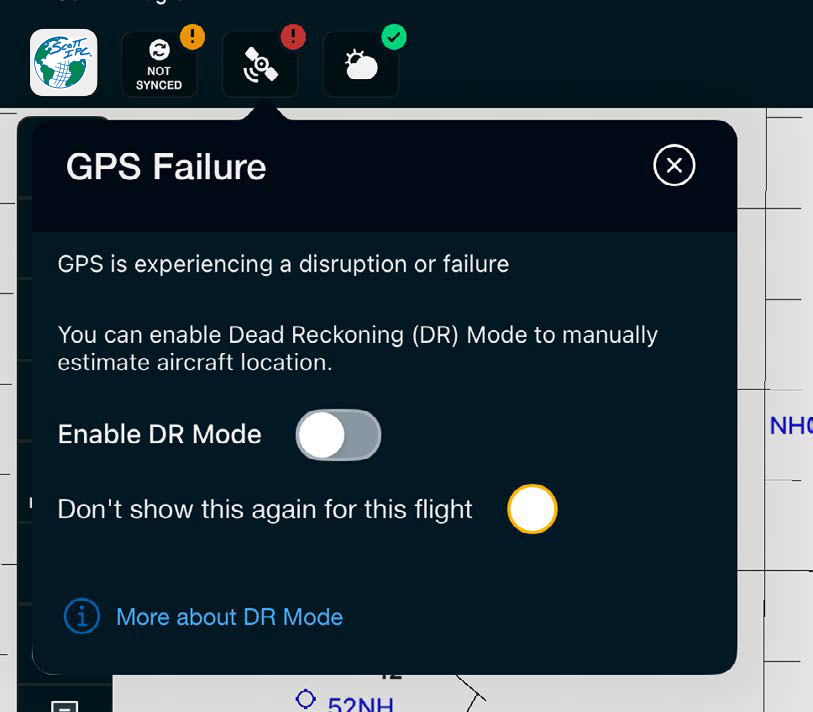
Additionally, a pop-up box will appear below the GPS icon 90 seconds after the app identifies a GPS failure, presenting an option to Enable DR mode.
Note: A GPS failure is identified in the app when no position information is received from the GPS source for 30 seconds.
Setting Up the DR Active Leg
Select your START and END points for the DR ACTIVE LEG. This can be done by dragging and dropping them on the chart or manually entering them in the provided DR Active Leg entry fields.
Input the LEG AVG WIND direction and speed in knots.
Enter your Estimated True Airspeed (EST TAS) to complete the setup of your DR Active Leg.
Preparing the DR Next Leg
Scroll down in the DR tool to find the DR NEXT LEG fields.
Confirm or enter the correct START and END points for the next leg.
Enter the NEXT LEG AVG WIND direction and speed in knots, followed by the EST TAS.
Starting the DR Tool
Initiate the DR tool by pressing the green Start button. This activates the tool and starts the stopwatch.
Once activated, a red circular estimated position icon will begin progressing along the rhumb line route (DR route).
Managing Subsequent Legs
Each subsequent DR NEXT LEG is set up following the same process. To stay ahead of the aircraft, pre-populate the NEXT LEG field before reaching your DR ACTIVE LEG endpoint.
As the DR tool reaches the endpoint of an Active Leg, the Next Leg automatically transitions to the Active Leg position of the DR tool, and the stopwatch restarts.
Continue to update your DR Next Leg fields with NEXT LEG ENDPOINT, LEG AVG WIND, and EST TAS data as necessary.
Reviewing DR Logs
Scroll to the bottom of the DR tool to access and review the DR Log, which contains information on completed legs.
During Journey Logbook closeout, you can include the DR Logs in your Journey Logbook if desired.